We make things that go the distance and stand the test of time, so we thought we’d better help you out with installing your new Menu Board and get the job done right.
You or your handyman is looking at taking about 30-45mins once you’ve got the tools ready, so get a good playlist going, pour yourselves both a cuppa and enjoy the quick and easy process.


What you’ll find in the box.

The Display Lettering comes with all the basics for what you need to make the installation an easy process. We’ve included the bits and pieces made for mounting onto a studded drywall.
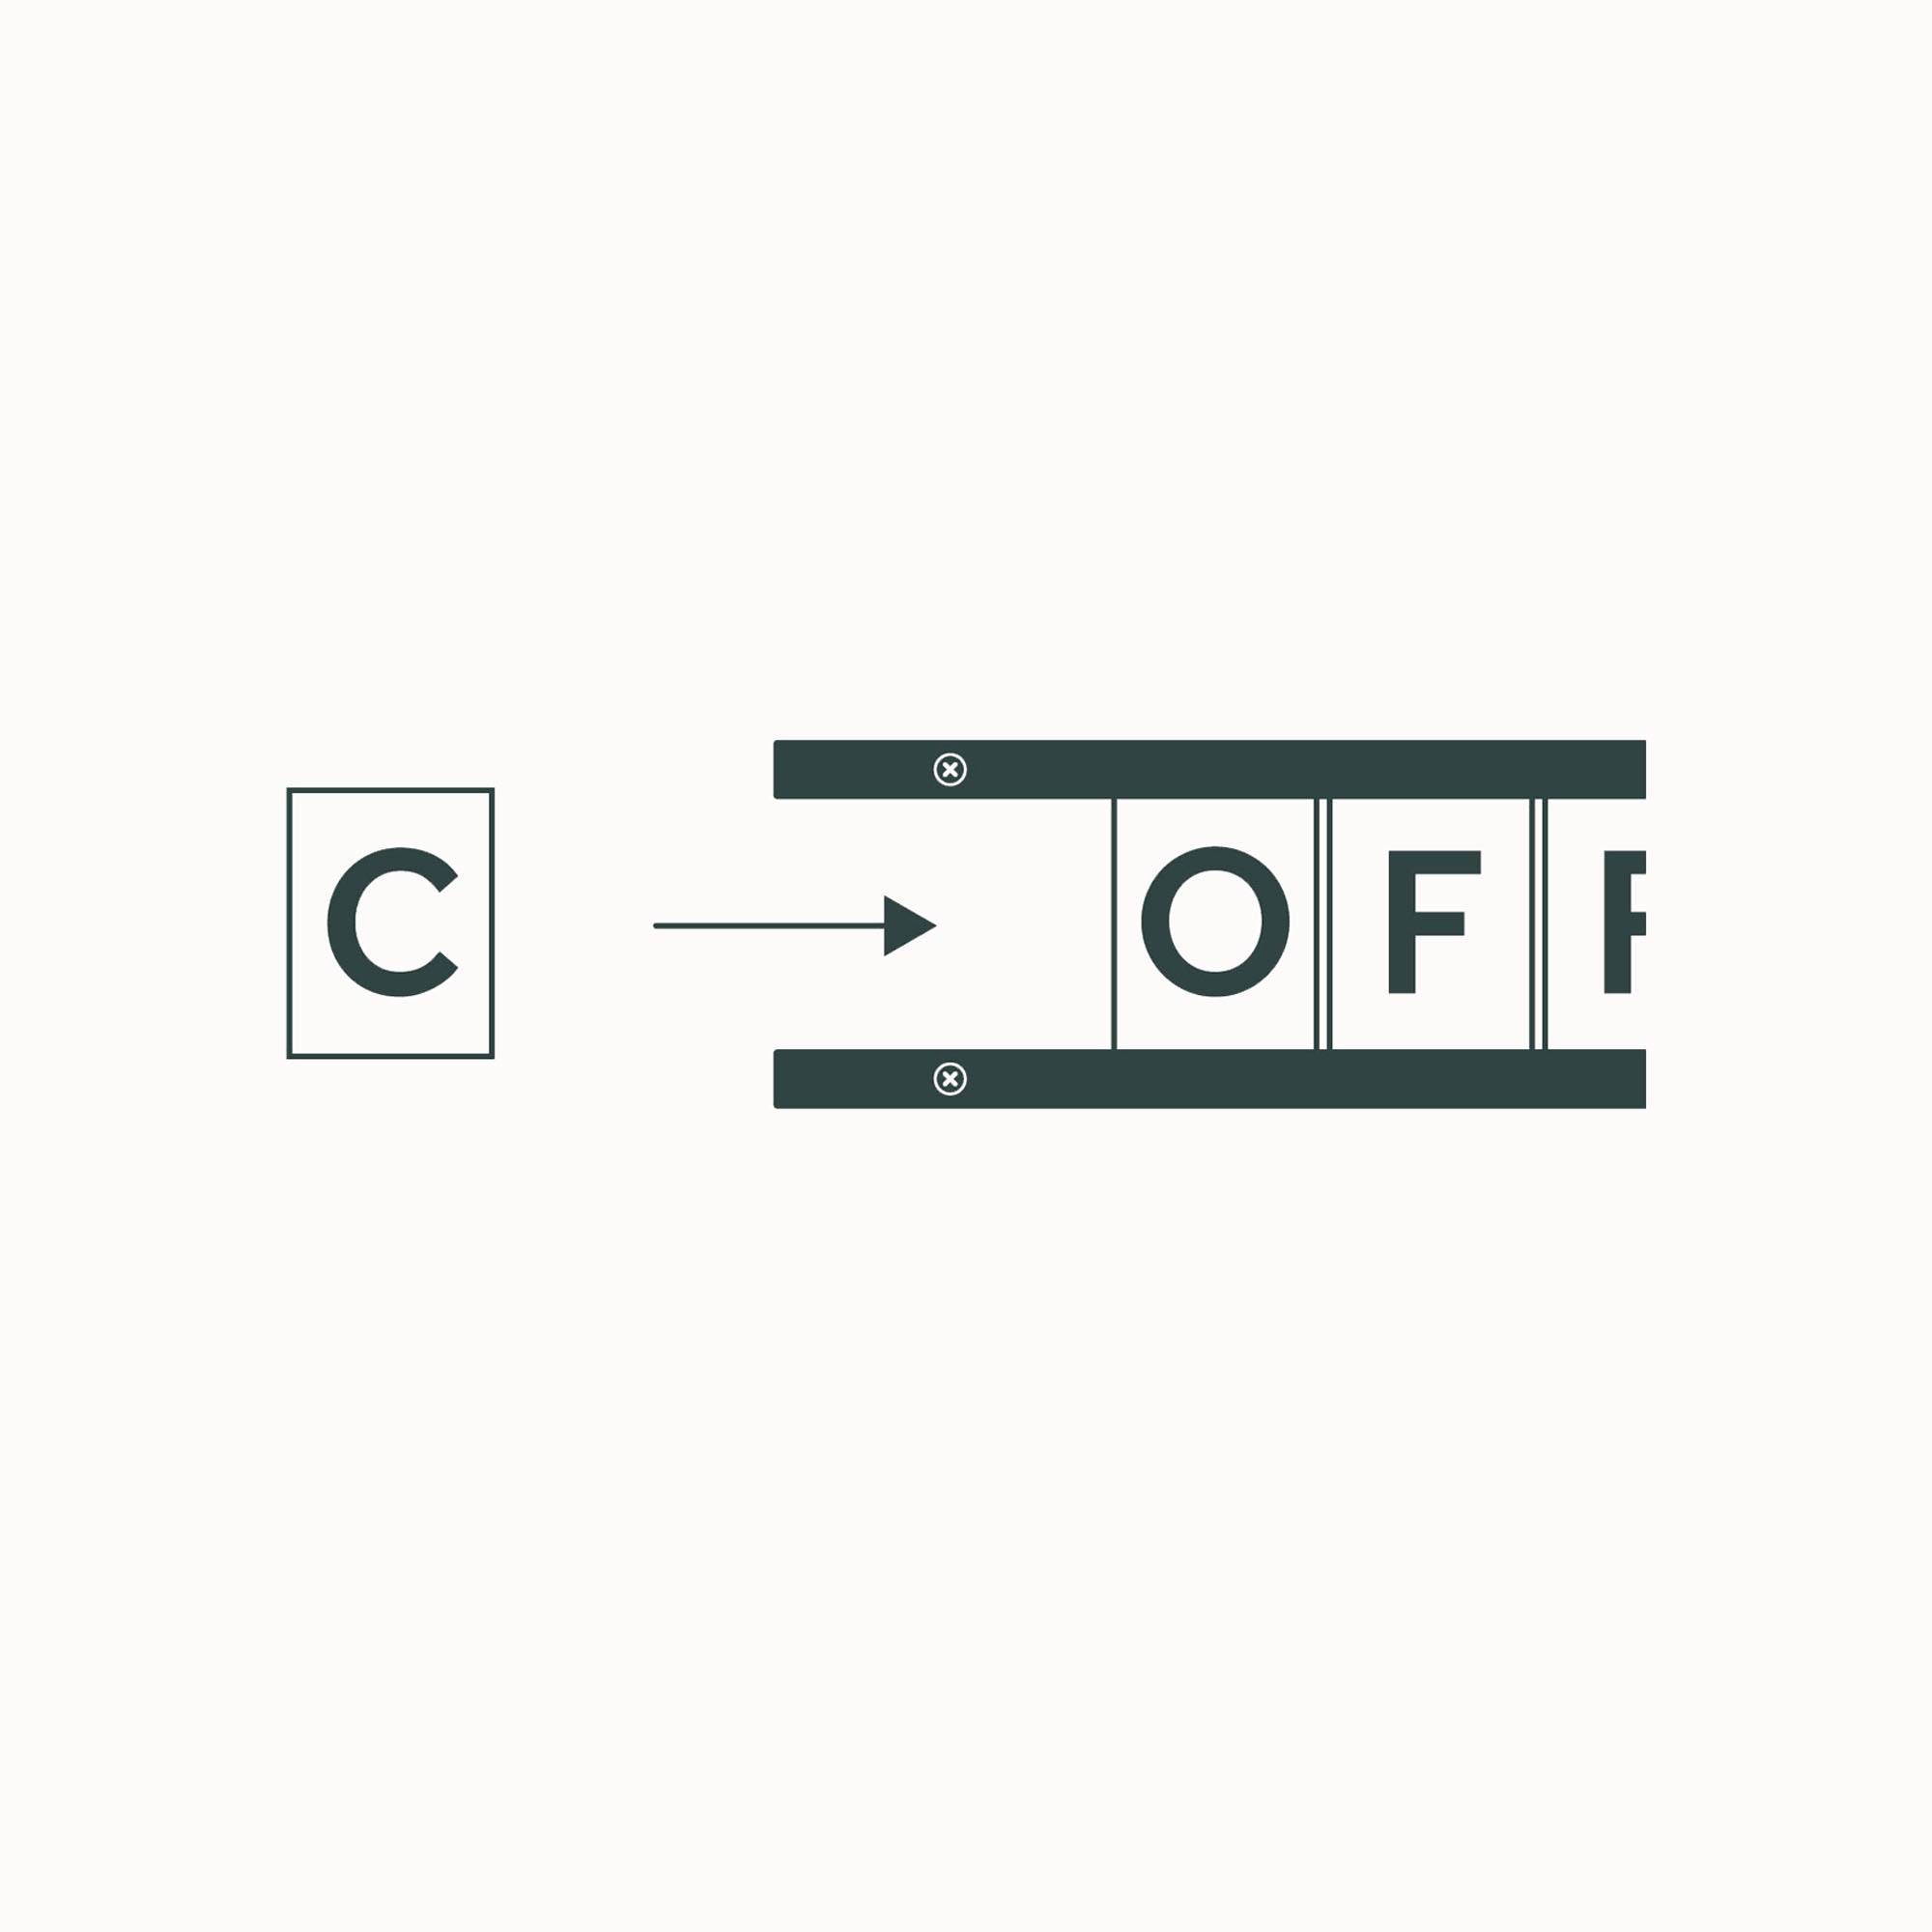
And if you find that you’re short of a few letters, we’ve added some extra letter stickers inside the box that you can put on the back of spare tiles.
Note - you may need just a few extra handy tools if you’re installing onto a concrete, gib board/drywall wall or tiles, check what we’ve listed below.
Here’s a small list of the things that will be beneficial to the installation process. You should find that most handymen will already have these extras in their tool kits.
Note - The screw size provided is 20mm/0.79in x 3mm/0.12in


Step by step installation guide.
STEP 1.
CONFIGURATION

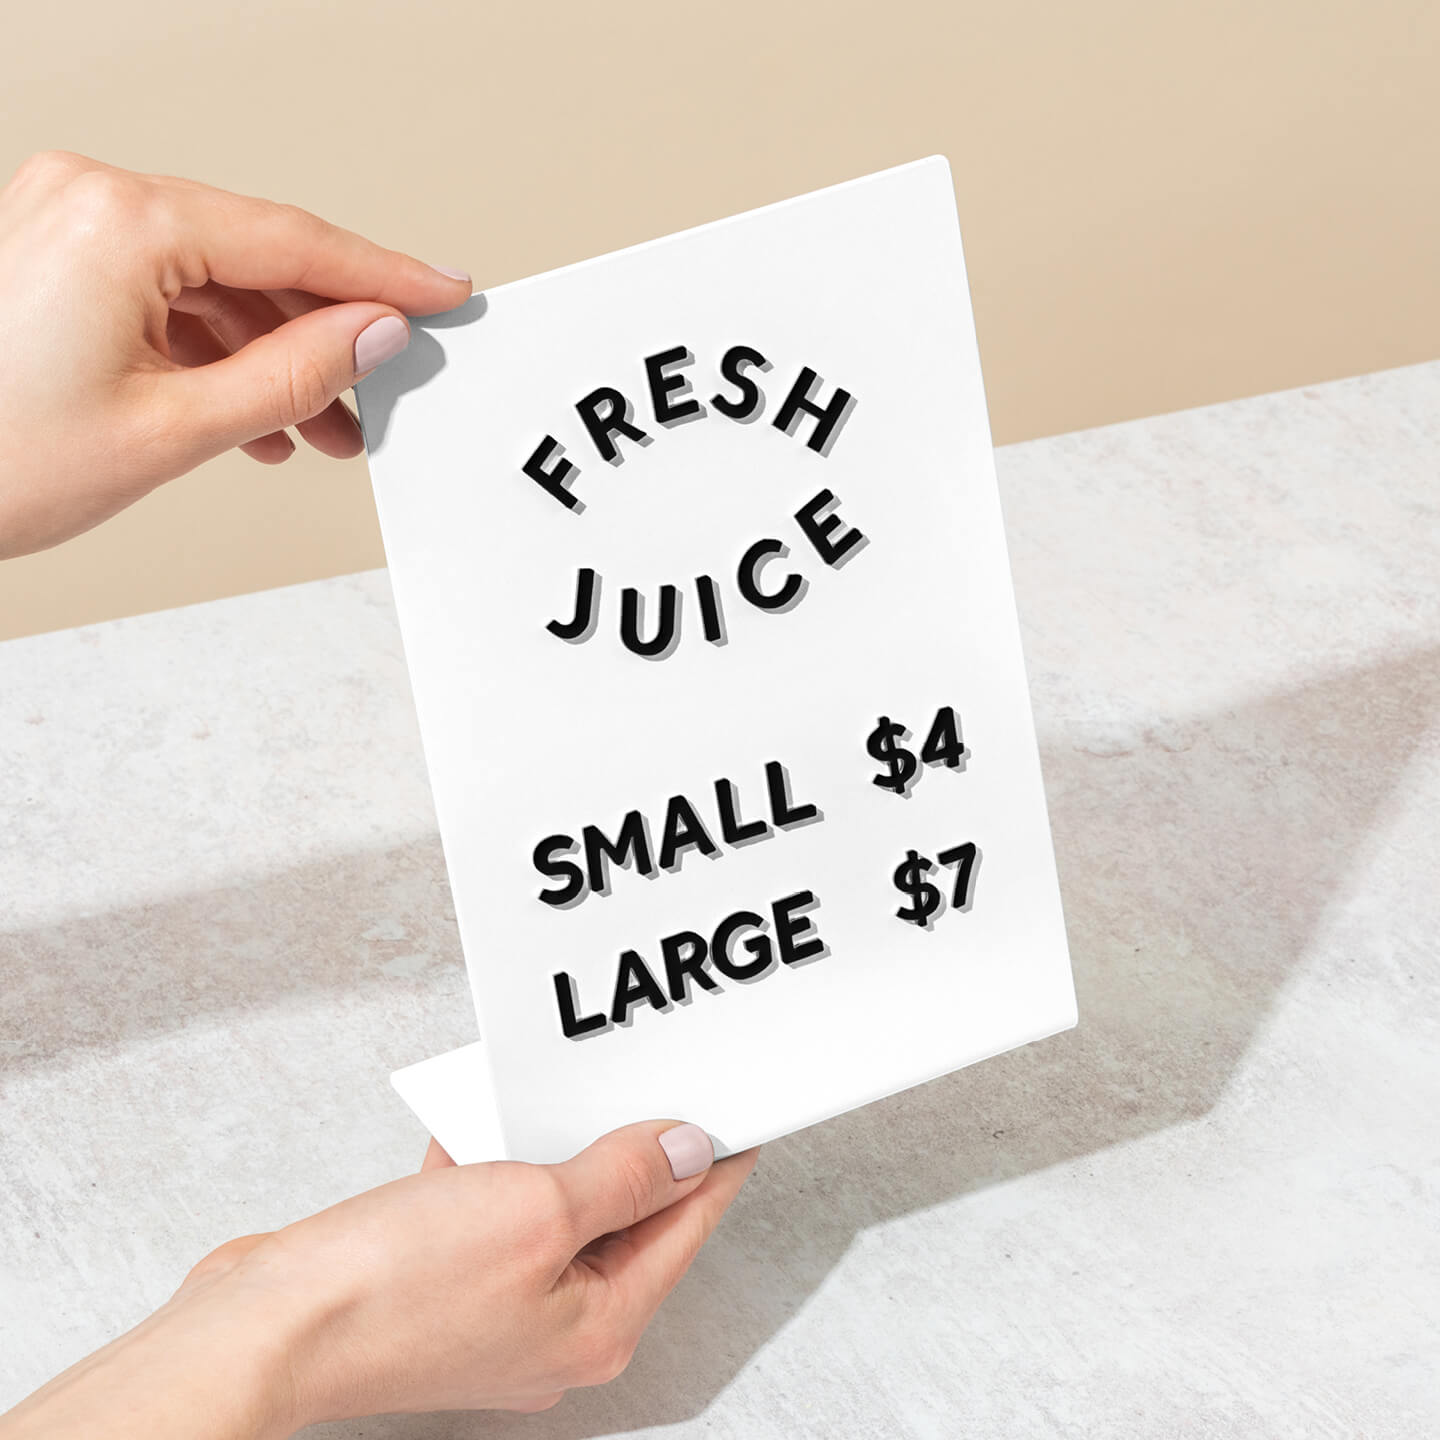
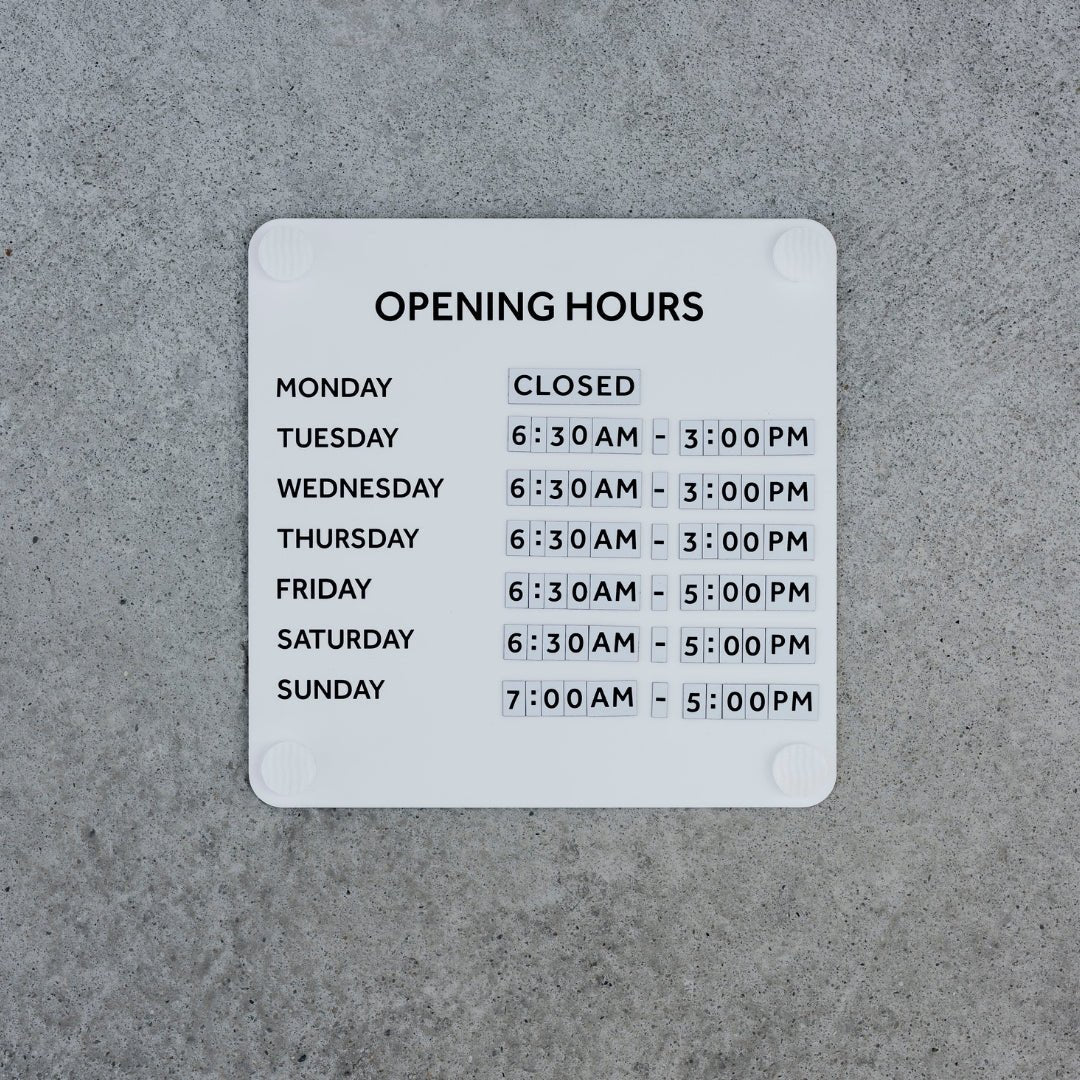
Whether you’re displaying a food menu, coffee list, or your favourite quotes, the Wooden Letter Board aims to compliment that. You can lay the rails side-by-side or vertically - whatever works best for you!
STEP 2.
PLACEMENT

Select a wall-space to install the Wooden Menu Board. Insert the first screw in the left end hole in what will be your bottom rail.
STEP 3.
LEVEL + POSITION

Using a level, position the rail so it is perfectly horizontal. Fasten the second and third screws and ensure the rail is securely fixed to the wall.


STEP 4.
SPACING + FIXING

Place the spacer on the first rail. Using this as a guide, position and fix the second railing onto the wall. Continue this method for the remaining rails. Make sure the rails are nice and tight on the spacer to ensure that they stay parallel.
STEP 5.
ARRANGE YOUR TEXT
Easy as that! The rails are now fixed in place and ready for you to arrange the text, simply slide the letters in from either end and you’re good to go.
Wooden Letter Board in your space.
Check out our 6 ways to use the Wooden Letter Board blog post and Wooden Letter Boards around the World to give you some inspiration for installing in your space!


FAQS
Can you provide longer rails for the Wooden Letter Board?
No sorry, we don’t make custom-sized Letter Board sets. However, if you add two Menu Board rails together horizontally you will double their length.
Does the Wooden Letter Board come with numbered tiles so we can put prices on our menu as well?
Yes there sure is, when you order a full set Wooden Letter Board, it comes with 20 tiles of each number from 0-9.
Can I order extra Display letters if I run out?
Yes, if you find that you need another set of Wooden Letter tiles for your Menu Board once you have ordered, we can arrange this for you. Simply get in touch. Otherwise, All of our Wooden letter displays come with extra vinyl stickers of characters that can be placed on the blank back of tiles if you run out of any letters.
Do you offer bulk discounts on Wooden Letter Boards?
Yes, we offer bulk discounts on all of our menu boards when used for commercial fit-outs and ordering more than ten units, simply get in touch with our team.
Do you offer the Wooden Letter Board in other colors?
At this stage, the display lettering is available in either natural wood, or painted white. The aluminum rails are either black or white. You are able to customize the color combination of your Menu Board to match your interior fit-out.
Do you make a smaller size Wooden Letter Board?
Yes we sure do, the Scout Letter Board is the smallest of our Menu Boards for your home or cafe.
How tall does the Wooden Letterbaord Sit on the Wall?
The Menu Board, when mounted to the wall sits 660mm / 26" tall this allows for a space between your letter tiles and display lettering too. The height of your Menu Board can be decreased with less rails or single spacing as well.
Can the Wooden Letter Board be mounted outdoors?
The Wooden Letterboard is designed as an interior menu display. Although the rails are made from aluminum, so it isn't susceptible to rust, the wooden display tiles will last a life time when used indoors only.

We would love to see how you are using your Wooden Letter Board! Tag us in your photos @georgeandwilly